If you prefer to invite users manually, one at a time directly within the platform, please refer to this article.
We recommend using this feature only if you want and are able to send the emails yourself. The output will be a CSV file containing the links, email addresses, and languages, but you will still need to distribute the emails independently.
Alternatively, you can prepare the file with the links and share it with us, and we can handle sending the emails on your behalf.
Step 1: Export the list of Team Members you would like to invite.
-
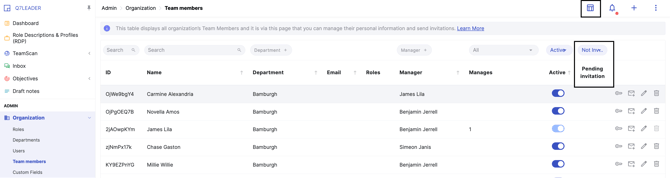
Navigate to Admin > Organization > Team Members.
-
Use the filters to display only the members you wish to invite. Click the icon at the top right to add the "Pending Invitations" column, then filter this column by "Not Invited". This will show only the users who have not yet received an invitation to the platform.
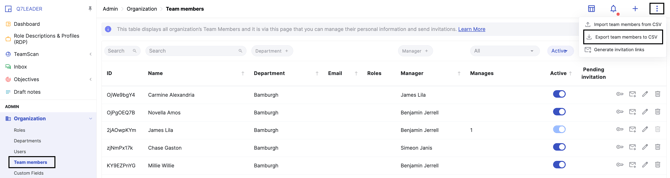
- Click the three dots at the top right and select "Export Team Members to CSV".
Step 2: Generate Invitation Links
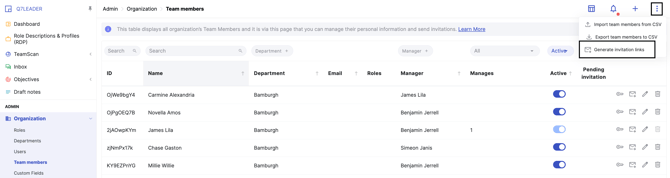
- Navigate to Admin > Organization > Team Members.
- Click the three dots at the top right and choose "Generate Invitation Links".
-
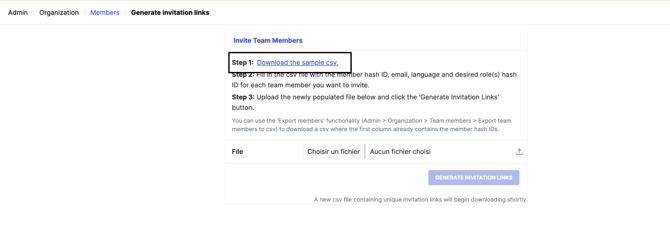
Next, click "Download the sample CSV".
Step 3: Check your Roles List
To learn how to create and manage your Roles, please refer to this article.
-
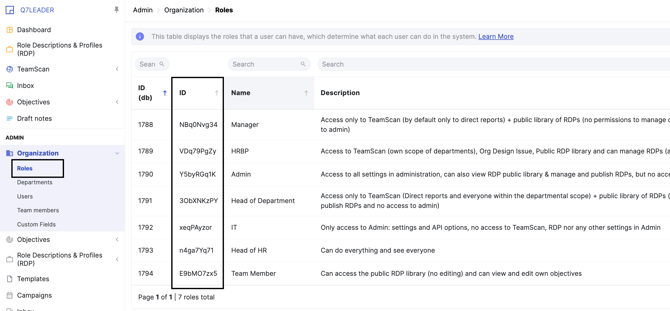
Navigate to Admin > Organization > Roles
-
To invite your users, you will need the IDs of the different Roles you want to assign to the Users.
Step 4: Open both files, the Team Members CSV and the Invitation Links CSV.
Open both files using your preferred program, such as Google Sheets or Excel.
For additional guidance on opening a CSV file in Excel, please refer to the instructions in this article.
Step 5: Populate the Invitation Links sheet.
To populate the Invitation Links sheet, you will need the following information:
-
Team Member IDs
-
Emails
-
Languages
-
Role IDs
Tip: You can add a column with the Team Members’ names to make the sheet easier to read, and delete it once you’ve gathered all the necessary information.
-
Copy and paste the Team Member IDs, emails, and languages from your Team Members sheet into the Invitation Links sheet.
If you are using SSO, ensure you use the email addresses associated with your SSO account. For more details, please refer to this article.
-
For the Role ID, select the appropriate ID from the Roles list in the platform.
-
You can assign multiple roles by entering their IDs in the same cell, separated by a comma (,).
Example: If you want to assign both the Manager and Team Member roles to a user, enter the following in the Role ID cell for that team member:
NBq0Nvg34,E9bMO7zx5Step 6: Import your Invitation Links into the platform.
-
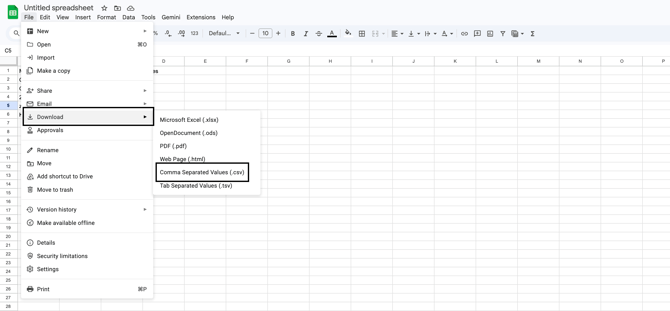
Once you’ve filled in all the required information, download the file as a CSV with comma separators.
-
Keep only the following columns: Team Member IDs, Emails, Languages and Role IDs.
If you are using Excel, make sure to export the file in CSV UTF-8 (Comma delimited) format. Before proceeding, open the exported CSV file in a text editor such as Notepad to confirm that the values are separated by commas. Depending on your system’s settings, Excel may use a different delimiter. If the file is not comma-separated, please follow the step-by-step instructions in this article to adjust the settings and generate the correct format.
-
Return to the platform and navigate to Team Members > Generate Invitation Links.
-
Upload your file and click "Generate Invitation Links".
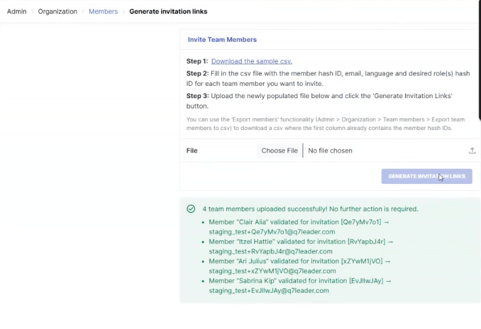
- This action will automatically download a file, which you will use in the next and final step.
-
Return to your Team Members list and filter the "Pending Invitations" column by "Pending Invitation". This will display all the team members you’ve just imported.
Step 7: Your file is ready!
The file is now ready for sending emails.
It contains all your team members’ email addresses along with their individual invitation links, so you can share them directly.
This final step can also be handled by the Q7 Team if needed. Once your file is ready, feel free to contact us for assistance.