![Variation=Brandmark, Color=WhiteVector.svg]](https://support.q7leader.com/hubfs/Variation=Brandmark%2c%20Color=WhiteVector.svg)
Accessing Questionnaires
To create a questionnaire, you must have the following permission enabled for your role:
access:questionnaires:create
An ad hoc questionnaire is a one-off survey you launch whenever you need it, without a schedule.
You can send it to people inside your company, to external participants, or to both.
In this article, you'll learn how to:
- Create the questionnaire and set its details.
- Invite participants from the Population tab.
- Understand how participants can answer.
- Track and close the questionnaire once you have the answers you need.
Good to know before you start
-
No time trigger: An ad hoc questionnaire has no start or end date. Invitations go out the moment you add someone and cannot be scheduled.
-
Details are final at save: The Title, Template and Focus Team Member cannot be changed once you save.
-
Nothing closes it for you: The questionnaire stays open until you close it yourself.
Create the questionnaire
You can create an ad hoc questionnaire from two places:
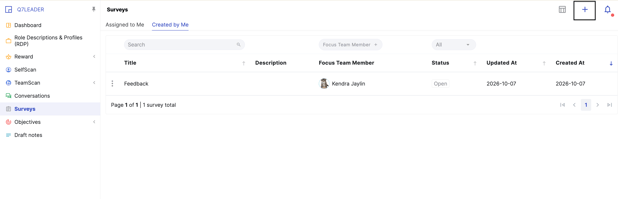
- From the Questionnaires module: go to Questionnaires > Created by Me and click Add.
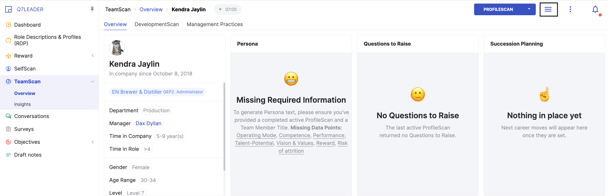
- From a TeamScan's profile: open the person's individual TeamScan page and start the questionnaire from the side panel.
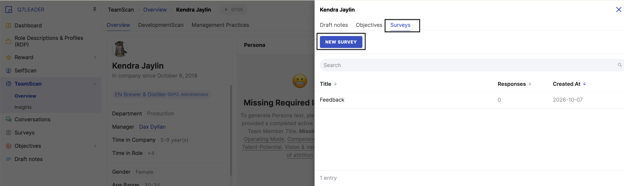
Then fill in the questionnaire details:
- Title: The name participants will see.
- Template: The questionnaire to use. You can choose an existing template from your organization or create a custom one that will only be available to you.
- Focus Team Member (optional): The person the questionnaire is about.
- Click Save to create the questionnaire.
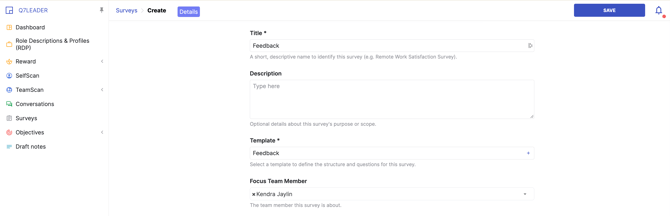
Check your details before saving
The title, template and Focus Team Member lock as soon as you save.
There is no draft mode, and you cannot rename the questionnaire or swap the template afterwards.
If something needs to change, delete the questionnaire and create a new one.
Invite participants
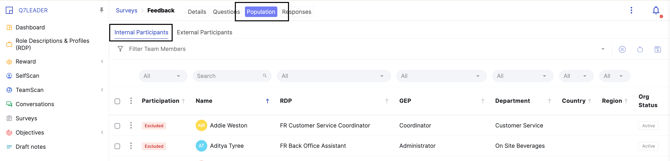
Open the Population tab of your questionnaire.
Internal participants
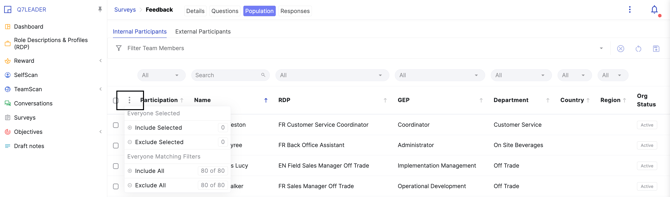
- Use the filters to find the people you want.
- Click Include to add them, or Exclude to leave them out.
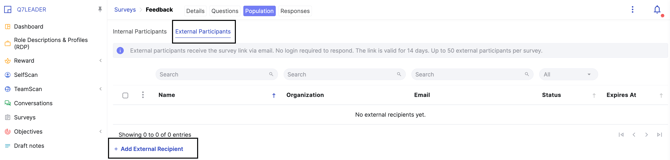
External participants
- Enter the person's name and email address.
- They receive a private link to the questionnaire.
Invitations are sent right away
Adding someone to the population invites them immediately.
There is no separate Send button, and invitations cannot be scheduled for later.
Removing a participant deletes their answers
If you remove someone who has already answered, their answers are deleted along with them. This cannot be undone.
How participants answer
Internal participants
People in your company can access the questionnaire from:
- The notification bell.
- Their agenda.
- Assigned to Me in the Questionnaires module.
They then have two options:
- Save keeps their answers as a draft. In the report, this shows as Started.
- Submit sends their answers. This is final, but they can reopen the questionnaire to read what they sent.
Internal participants can submit their answers at any time, for as long as the questionnaire stays open.
External participants
- The private link opens the questionnaire form directly, with no login needed.
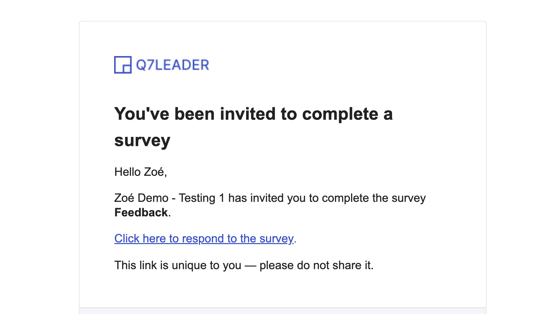
- The link works for 14 days. You can extend it in blocks of 14 days.
- You can invite up to 50 external participants per questionnaire.
- Once they submit, the link stops working.
Track and close the questionnaire
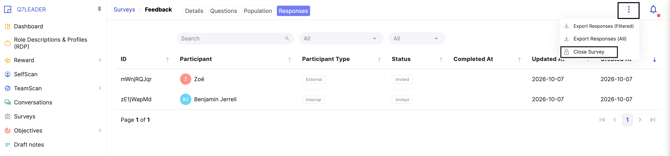
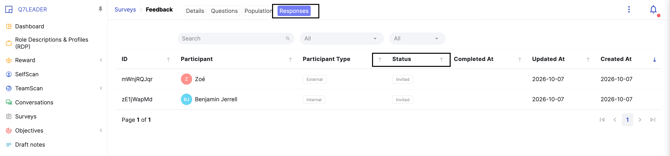
- Track progress on the Responses tab, where you can see each participant's status.
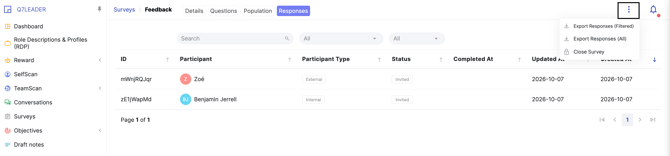
- Export the results from the header menu.
- Watch the Missed count. Nobody is notified when an external participant misses the deadline on their link, so check this count and extend links where needed.
- Close the questionnaire yourself when you are done. Nothing closes it automatically.